

Holographic printable vinyl from Hayes Paper is absolutely stunning but I know it can be a little difficult to get your Cricut machines to read the lines and sometimes your print itself doesn’t come out as beautiful as you think it should. This blog is going to show you how to navigate the issues you may face with this gorgeous paper! By the way I am Corinne Blackstone YouTuber and lifelong crafter here to help you make amazing stickers with your Cricut machines! There's a video and instructions below, so let's jump into it!
The first thing is to be sure you are using a quality image that will give you the best results with printing. I recommend using a PNG image but you can also print using SVGs if you have a design you like. When you upload your design you will want to be sure you save it as a “Print Then Cut Image” which is the full color image on the right (see Image reference below).

Before we get started on the sizing and laying out of our design we need to change our print then cut size in the settings menu on the Cricut Design Space software. The Hayes Holographic Printable Vinyl is a size A4 paper (8.3 x 11.7 In) and we want to be sure we use as much of the paper as we can.
With the A4 size paper your print then cut size is now 6.51 In x 9.93 In at the largest. You will notice your designs may be really large and there is a Red exclamation point in a circle next to the design on the layers panel. If you click that warning it will tell you exactly why it is there and how to fix your design.

A great trick to making sure you are using as much of your material as possible is to make a rectangle the size of your printable area, in this instance 6.51” x 9.93” and then lay out your designs on that sheet. You will want to remove the template and then attach or flatten your designs before you hit make it.

One thing that is new with Cricut is their registration marks. It wastes a lot less ink. You will notice the lines are now just in the corners and not all the way around your image. This makes it easier to trick your Cricut to read shinny / reflective surfaces, like this printable product.
This is how I set my printer to get the best print settings; on the Cricut leave the bleed on and turn on the printer properties option.
In the printer properties you will do the following:
- Check the paper size matches the A4 paper 8.3 x 11.7 In
- Change you paper setting to premium photo paper glossy
- Quality set to high
- Under more options turn off the high speed or bidirectional print
- Click ok and then click print to send your design to the printer

Now this is where a lot of people have issues, especially if you are using the Cricut Explore series machines. You may ask why does the Explore not work as well with this? It is because the machine is designed to work with White paper only which means this shiny silver paper is not easy for the machine to see and read the registration lines. The Cricut Maker may also have issues and here are a few tips to help fix the problem. Choose one of the below hacks to get your registration marks to be read. You can combine techniques to get the registration marks to read.
- Trace over the lines with a black sharpie
- Cover the lines with a matte scotch tape (clear of course)
- Turn off overhead lighting
- Turn on overhead lighting
- Shine a flashlight along the carriage as it reads the lines
- Paint white acrylic paint around the lines or tape white paper around them. Do not cover your lines
- Put scotch tape directly on your sensor

These are all things I have tried and had success with. Now if one does not work try another trick. You will find one that will work best for you and your machine. They are all so different.
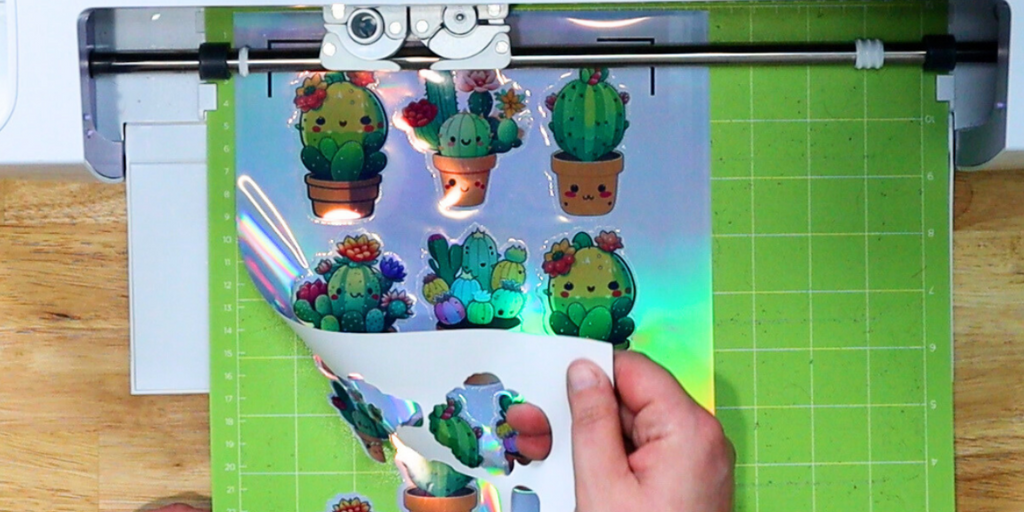
I cut this product on the medium cardstock setting and I cut it twice, meaning when it finished the first cut I do not unload the mat, I simply pressed the GO button again and allowed it to cut a second time. It is important to not remove the mat. If you take the mat out the Cricut will not be able to cut along the exact same line it cut the first time.
Giving these tips and tricks a try you should end up with perfect, gorgeous stickers! I use an Epson EcoTank printer which is an inkjet printer for my stickers and am really pleased with the color and details this printer gives me with my stickers! Please note that Cannon printers are not compatible with any of Hayes Paper Co's Glossy or Holographic Vinyls, unfortunately their ink is oil based and won't dry on the vinyl.
I am so impressed with the quality and color of these stickers using the Hayes Holographic printable vinyl. I have tried other papers and vinyl products but these stickers are the most colorful and have the best color shift from a holographic that I have seen. I hope you learned a few tips and tricks to working with the Holographic Printable Vinyl from Hayes Paper and be sure to check me out on my social media channels; Youtube, Instagram, TikTok and Facebook.
Thank you and as always HAPPY CRAFTING!!
Written by Corinne Blackstone